От халепа... Ця сторінка ще не має українського перекладу, але ми вже над цим працюємо!
Subscription Setup Magic With Google Play and RevenueCat

Roman Humyn
/
Android Develoepr
6 min read
Subscriptions have become a popular monetization strategy for Android app developers, allowing them to offer users access to exclusive content, features, and experiences in exchange for a recurring fee. With subscriptions, developers can establish a reliable revenue stream and build a loyal customer base that keeps coming back for more.
As mobile app subscriptions continue to grow in popularity, developers are turning to subscription management platforms like RevenueCat to help manage and monetize their subscription-based apps.
This article will walk you through setting up subscriptions for your Android app using RevenueCat, a popular subscription management platform, including steps not covered in the official RevenueCat guidelines.
Article content:
About RevenueCat
RevenueCat is a mobile subscription and purchases SDK that simplifies managing in-app purchases for Android developers. It provides a complete solution for implementing subscriptions and in-app purchases with advanced features like server-side receipt validation, subscriber management, and analytics.
Here are five key benefits of using RevenueCat for Android development:
- Easy Integration: RevenueCat provides a simple integration process that eliminates the need for complex code. It offers pre-built UI components, so developers can easily implement in-app purchase features.
- Reliable Infrastructure: With RevenueCat, developers can rely on a robust and scalable infrastructure that handles all the complexities of managing in-app purchases. This allows developers to focus on creating great user experiences.
- Subscription Management: RevenueCat provides advanced features for managing subscriptions, such as subscriber retention, churn prediction, and subscriber segmentation. This helps developers optimize their subscription-based revenue streams.
- Analytics: RevenueCat provides developers with detailed analytics on in-app purchases and subscriptions. Developers can track user behavior, analyze trends, and get insights into revenue performance.
- Receipt Validation: RevenueCat validates receipts on the server-side, ensuring that all transactions are secure and compliant with app store policies. This helps prevent fraud and reduces the risk of chargebacks.
See also: BottomNavigation View with some magic
Overall, RevenueCat is an excellent choice for Android developers who want to implement in-app purchases and subscriptions in their app. Its easy integration, reliable infrastructure, subscription management, analytics, and receipt validation features provide developers with everything they need to manage their in-app purchases successfully.
Configuration Steps
In this step-by-step guide, we’ll walk you through the process of setting up RevenueCat for your Android app.
- To get started, create a new app on Google Play, or use an existing one.
- Add dependencies. To ensure that the necessary permissions are pulled for billing, add the following dependency to your build.gradle file: implementation ‘com.revenuecat.purchases:purchases:X.X.X’ Without these permissions, Google Play will not allow you to create subscription products.
- Upload the first build. If this is a new app, you will need to upload the first AAB/APK to the internal testing track to initialize the project in Google Play. To upload the first build to the internal testing track, complete the steps provided by Google Play.
- Create subscription products on Google Play. Once all the first build upload is complete, you can move on to creating subscription products on the Google Play side. To do this, go to Monetize → Products → Subscriptions.
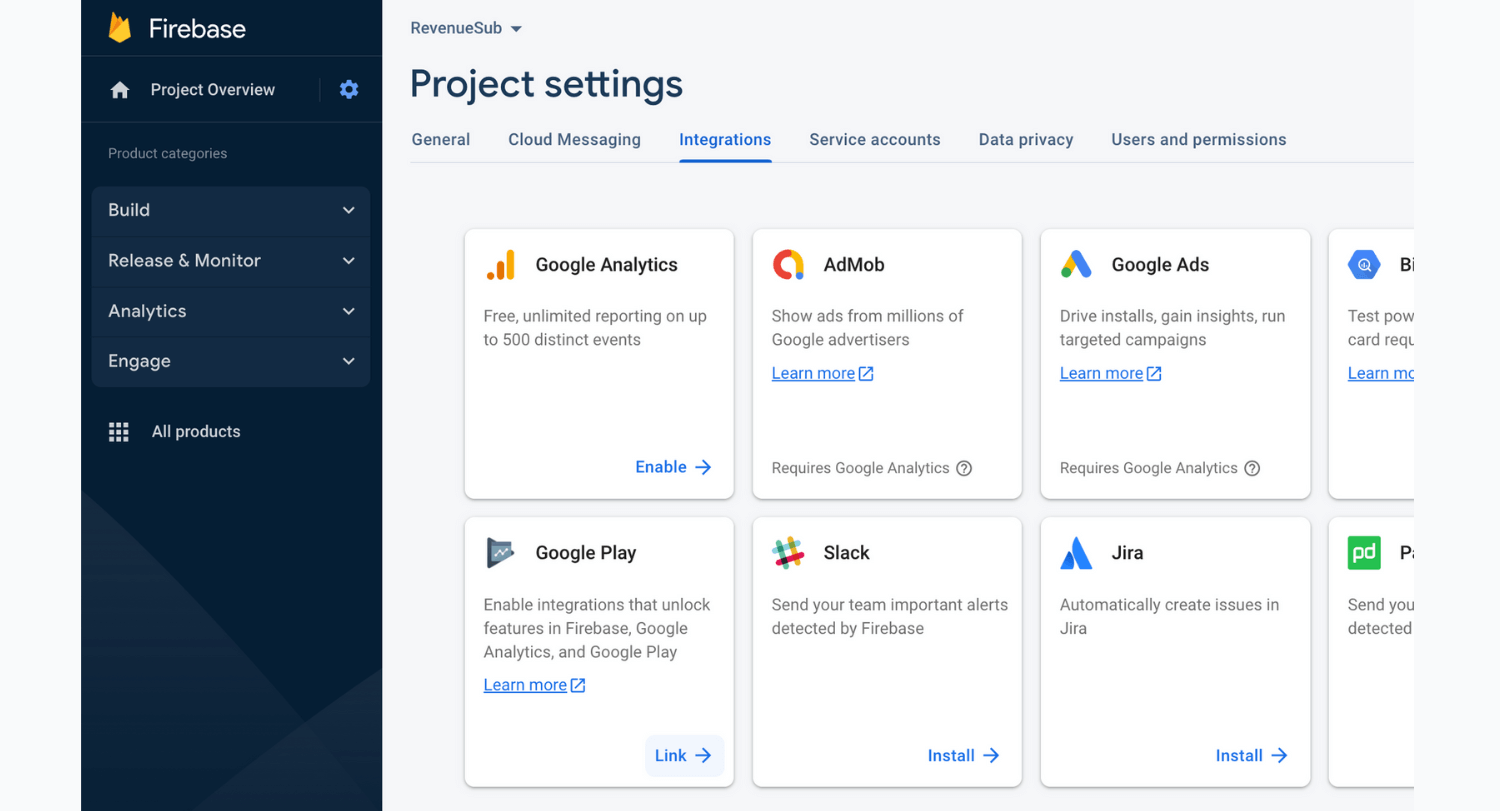
- Link the firebase project to Google Play. To link your firebase project to your Google Play account, go to Firebase Project → Project Settings → Integrations → Google Play → Link. Follow the steps in the linking form with the necessary settings for your project.
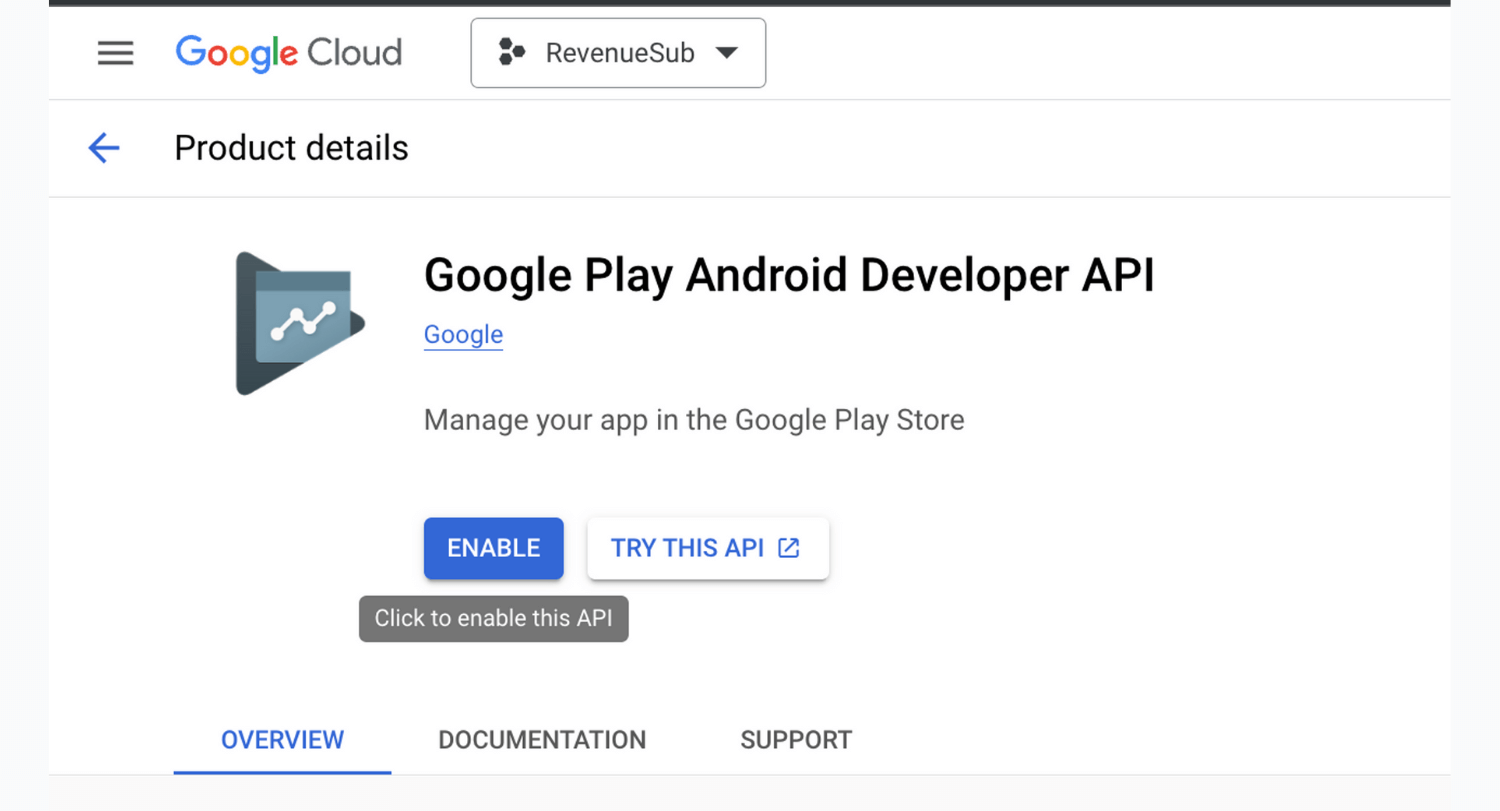
- Enable Google Play Android Developer API. You need to enable the Google Play Android Developer API on the Google Cloud Console side. To do this, go to your project in the Cloud Console, select APIs & Services → Library from the side menu, and search for Google Play Android Developer API. Click Enable.
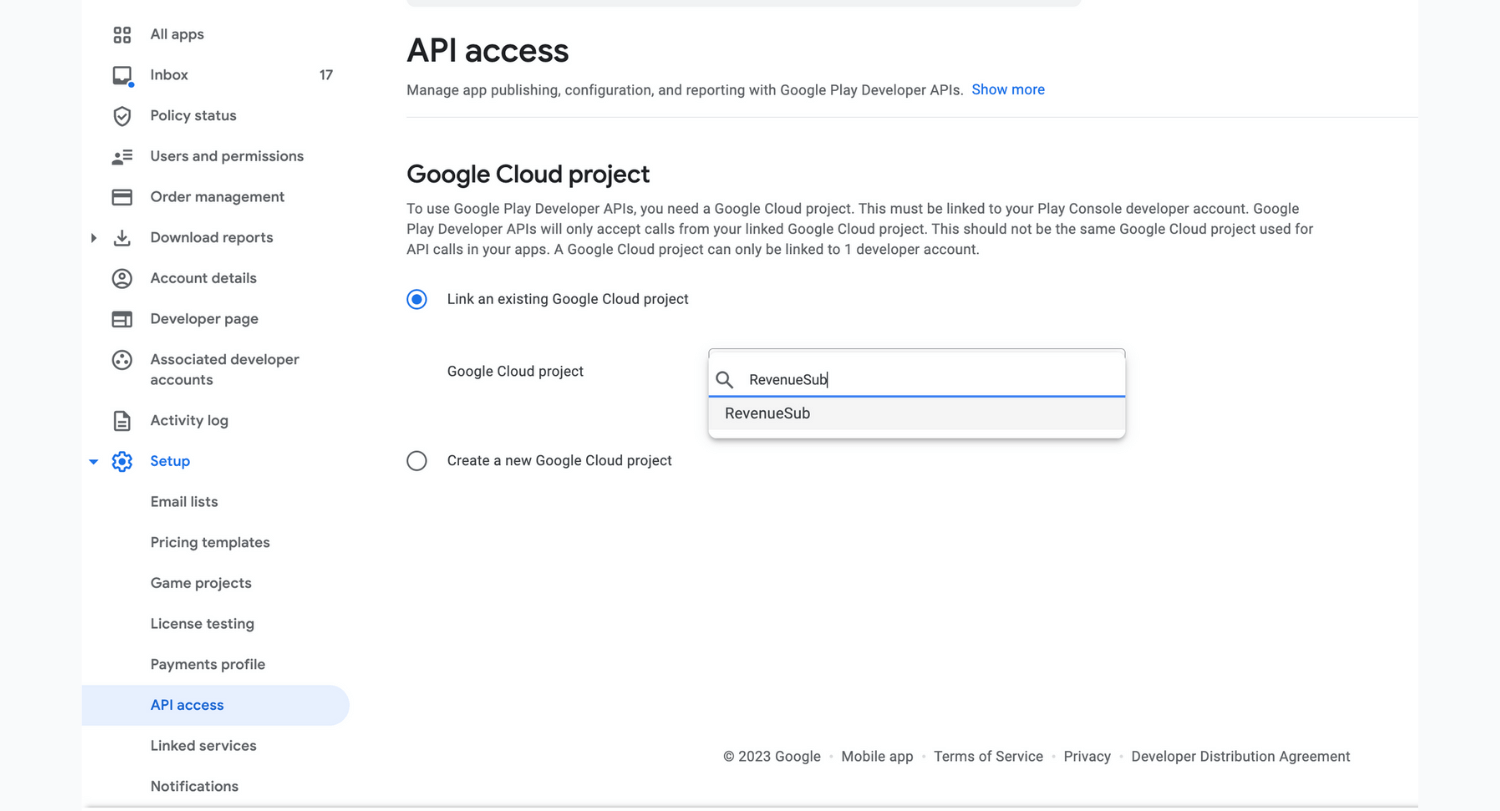
- Link your Google Play account to the Google Cloud Project. To do this, go to Home → Setup → API Access → Link an existing Google Cloud Project (access to these actions is exclusively for project owners) and select the appropriate project from the list of suggestions. Don’t forget to press Save.
- Configure a Service Account for Google Play Subscriptions. Finally, you must create a service account to work with Google Play subscriptions. To do this, go to IAM & Admin → Service Accounts in the Cloud Console side menu. Click Create Service Account. Fill in the service account name, and give it the Monitoring Viewer role and the Pub/Sub Admin role.
Create a key in JSON format for this service and save it locally. Then, back in the Google Play console API Access tab, you can grant access to the new service account. Select Finance in the Role dropdown and press Add User to give finance access to this service account. You should also grant access to the necessary app in the App Permissions section. Then, press Invite User.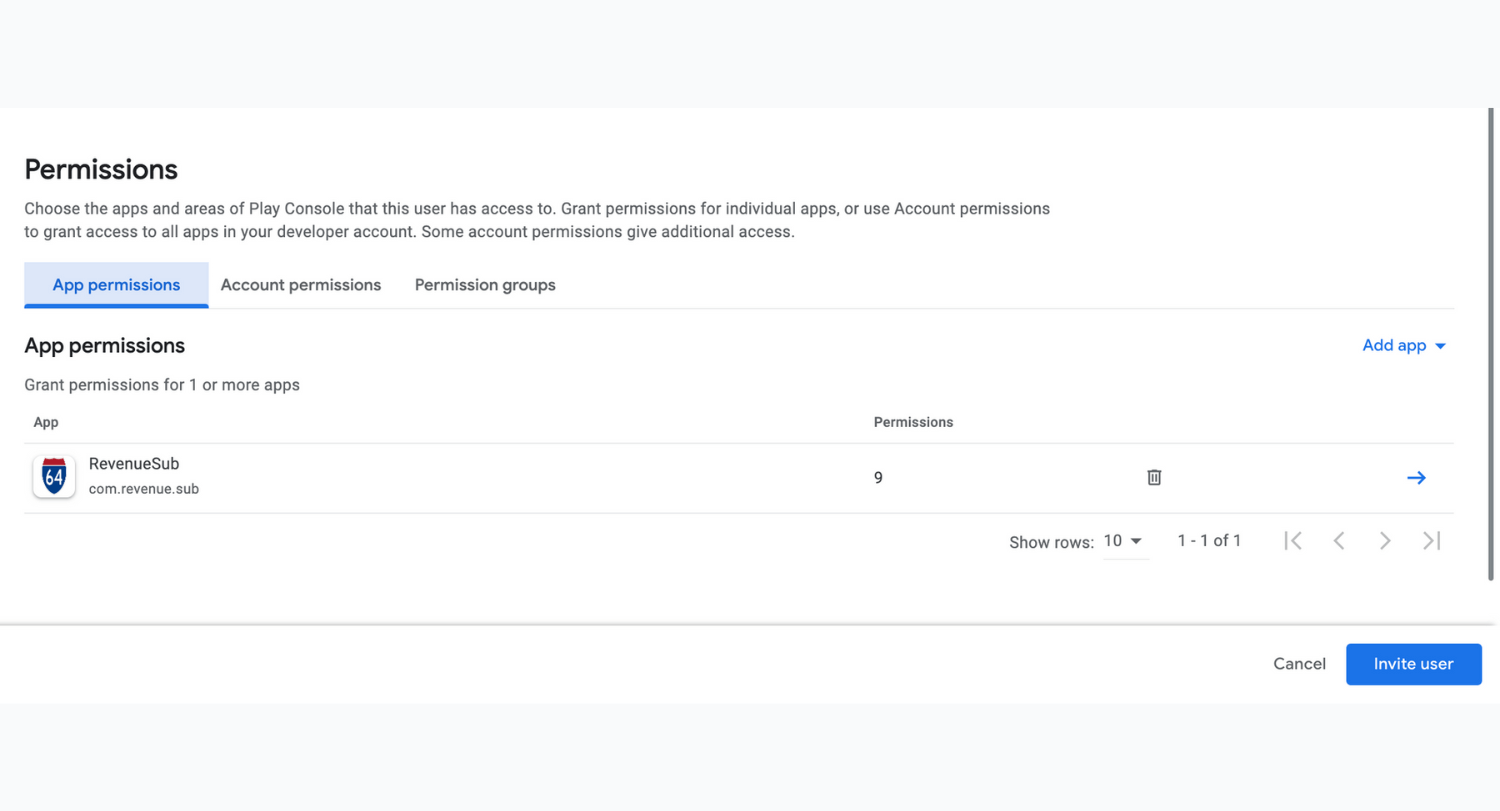
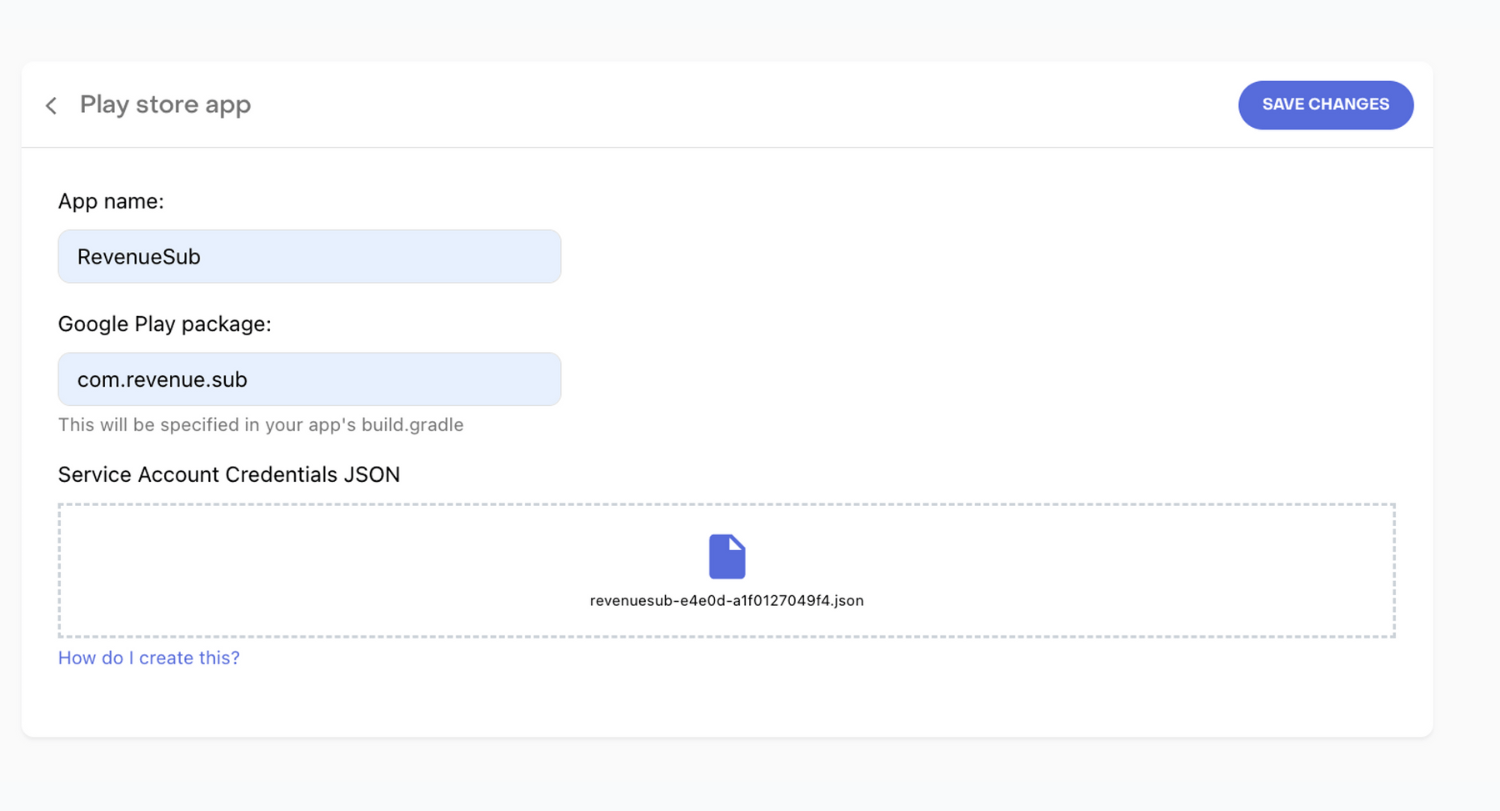
- Create an Android app on RevenueCat. Create an account on RevenueCat and then create an Android app by filling in the name, package name, and uploading the service account JSON file that you saved in step 8.
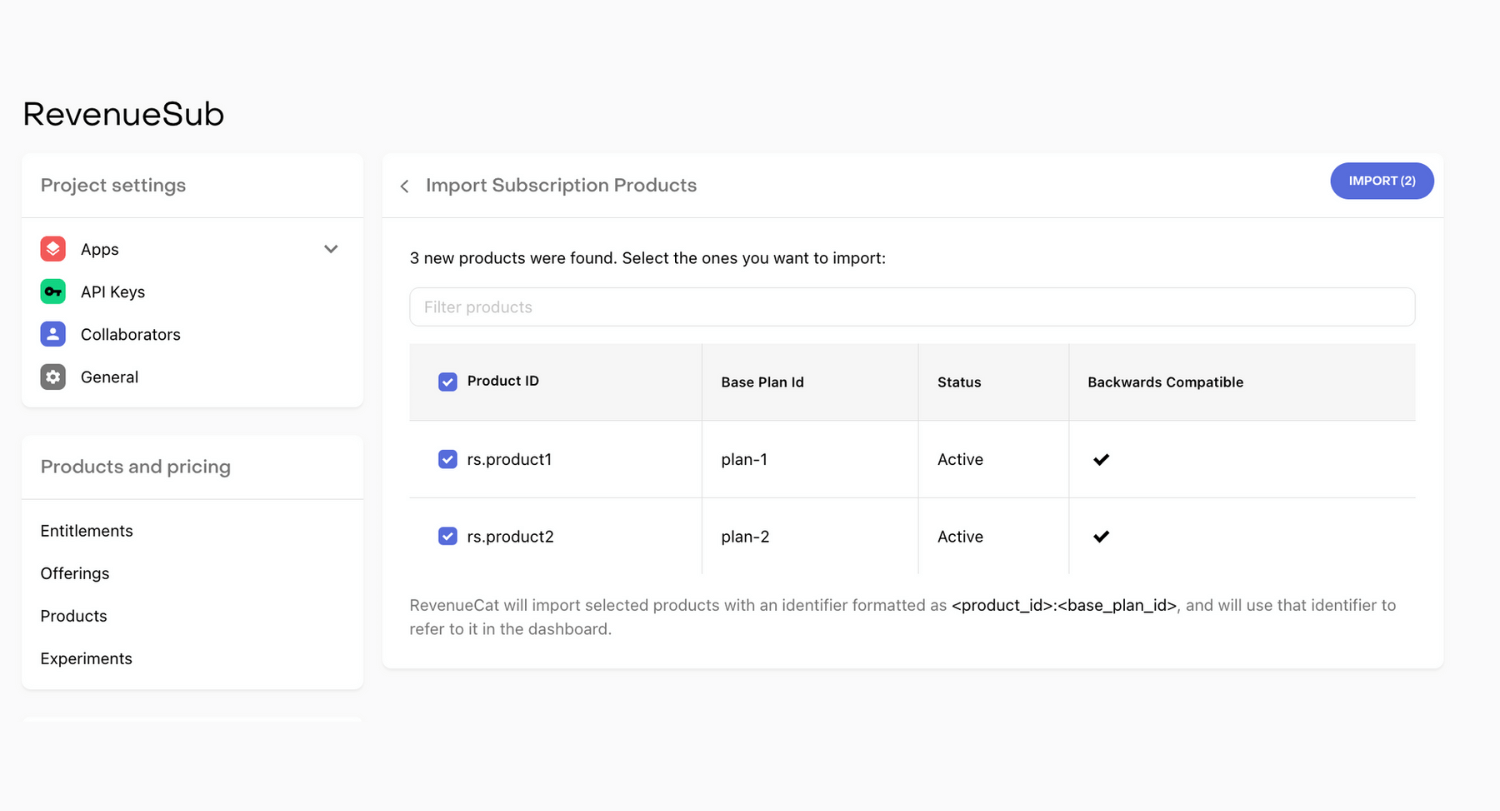
- Import Subscription Products in RevenueCat. In RevenueCat, go to Products → +New → Your App → Import Subscription Products and select the necessary products from the list. Click Import.
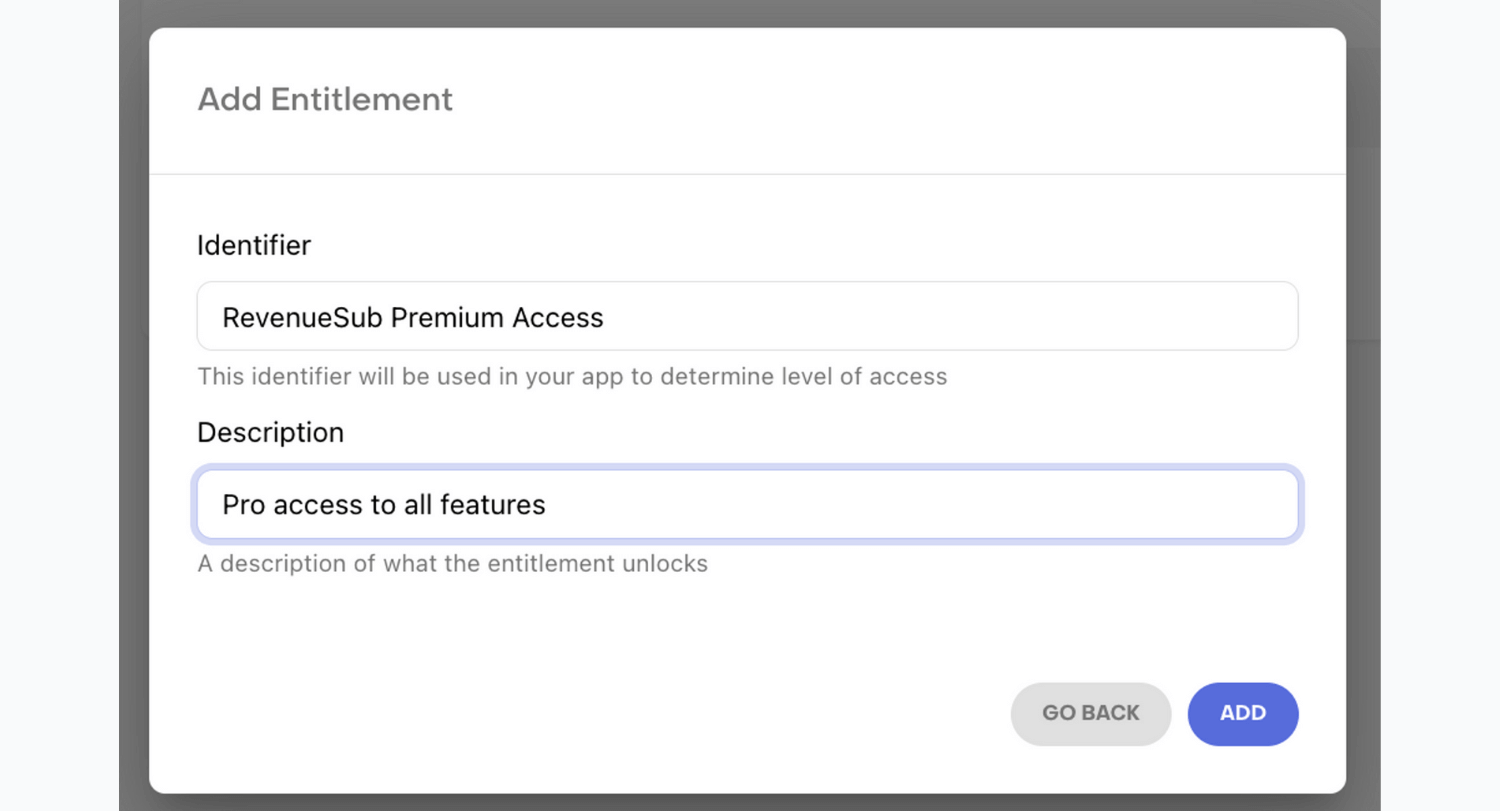
- Set up Entitlements in RevenueCat. Go to Entitlements, click on +New and specify an identifier and description, then click ADD. In the created Entitlement, click Attach and choose the imported products you want.
- Set up Subscription Offers in RevenueCat. Go to Offering and set up offers for each type of subscription, attaching each to the offer accordingly.
- Set up Pub/Sub for Google Play and RevenueCat. To do this, in the RevenueCat admin console, go to the application settings page and choose an available topic in the Google Developer Notifications Topic ID dropdown.
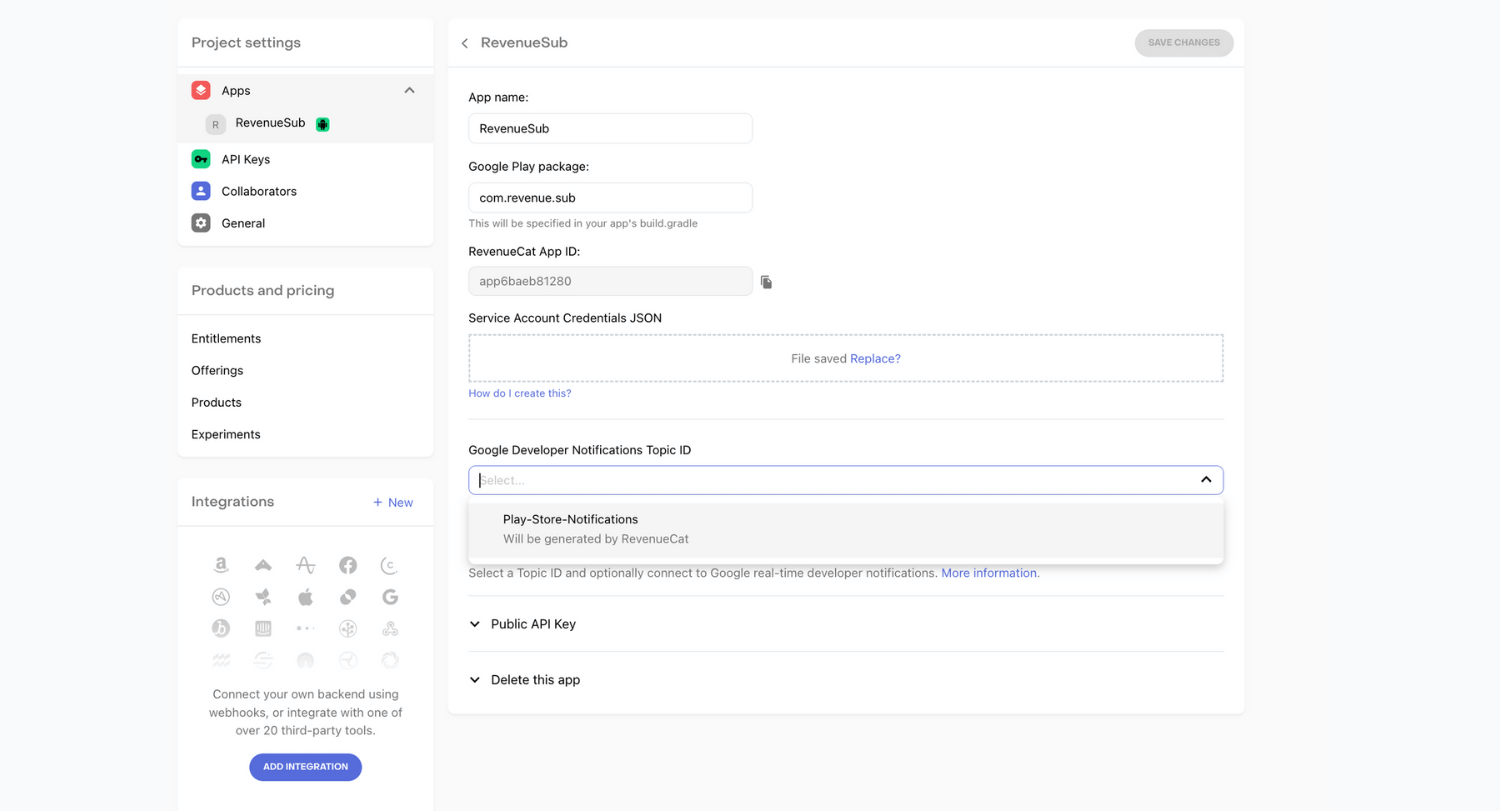
- Then click on Connect to Google. If the connection is successful, you will see a message at the top of the web page.

- Refresh the page, and you will have access to the Google Developer Notifications Topic ID, which you can copy. Go back to the Play Console and select your app. Then go to Monetize → Monetization setup. In the Topic name field, paste the previously copied Google Developer Notifications Topic ID from the RevenueCat console. Click Save Changes.
- To verify the connection, click Send test notification. After that, refresh the RevenueCat settings page and look at the field next to Google Developer Notifications Topic ID. It should display the date of receiving the test notification.

Congratulations!
You have successfully completed the configuration of Google Play and RevenueCat. Now it’s time to move on to the code implementation. Unfortunately, we won’t be covering the code implementation in this article, but RevenueCat’s official documentation has a comprehensive guide to assist you.

Conclusion
While the official RevenueCat documentation provides a great starting point for configuring in-app subscriptions for Google Play, they don’t cover all the necessary steps. This article has outlined some of the missing steps, such as setting up Pub/Sub, required for successful integration with Google Play, among others. By following these additional steps, you can ensure a smooth and successful configuration of your in-app subscriptions using RevenueCat and Google Play. We hope that this guide has been helpful to you and wish you the best of luck with your app monetization journey!
Get more insights:
See all

Sophia Pelekh
/
Marketing
— 4 min read


